
In this post, we’re going to look how to create a team page in Confluence. This page will list all the resources and stakeholders on your project, including their roles, responsibilities and contact details. We will construct this page from the point of view of a digital agency whose client has an existing 3rd party technical supplier. While we’ll be setting the page up for a project, there’s no reason why you couldn’t extend this concept to a programme of work or an entire account.
The goal: create the following team page
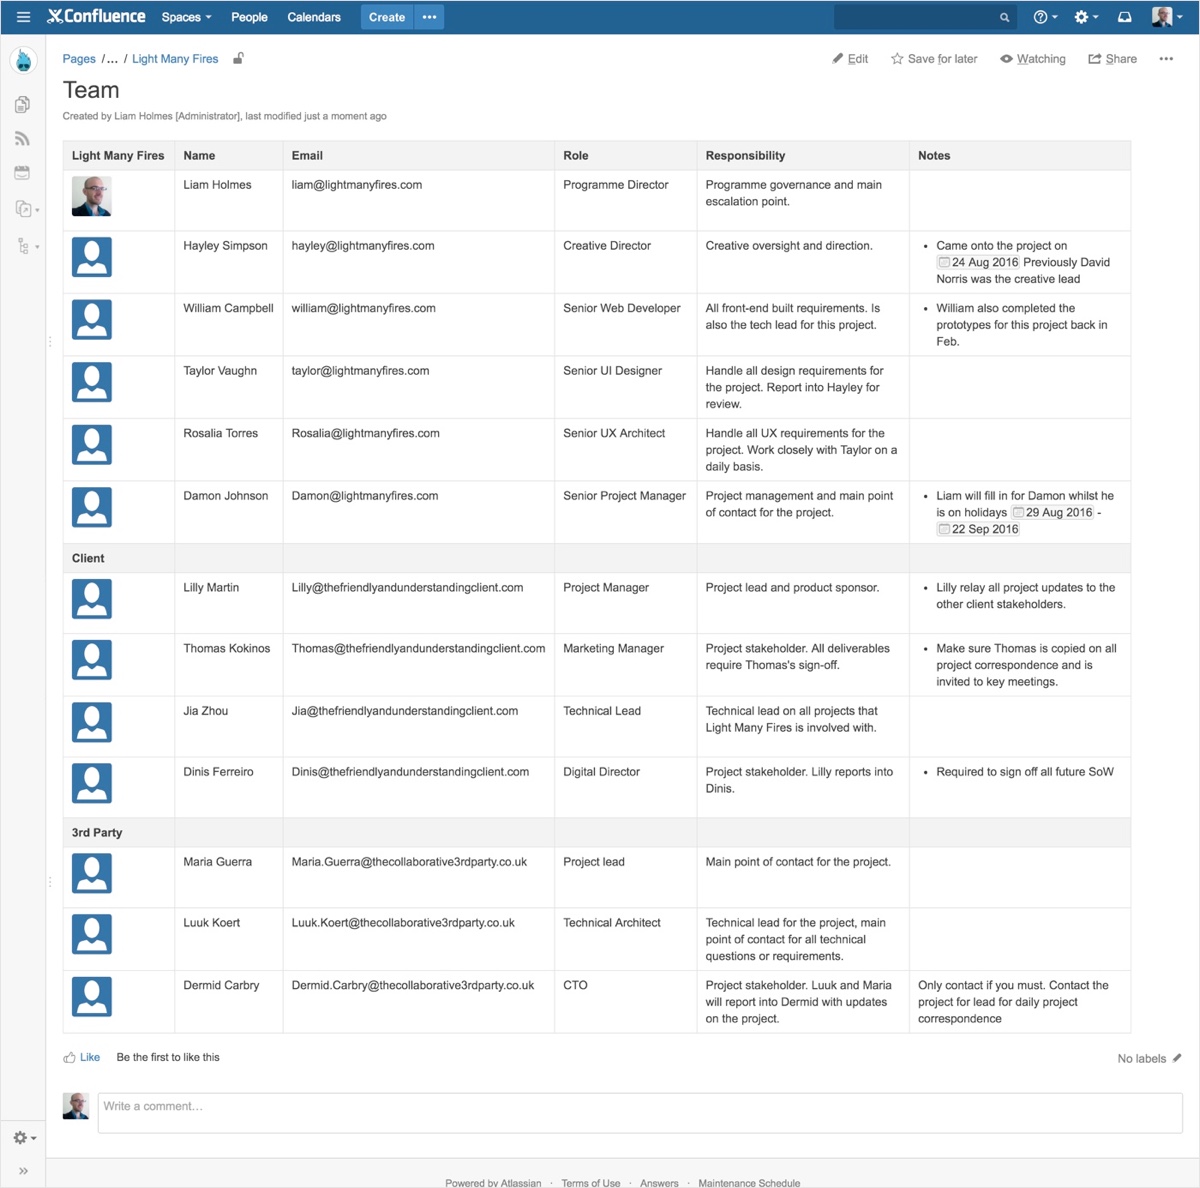
Given the fictitious nature of this project, I haven’t added any profile pictures other than my own. When you create your team page, I encourage you to ask your team members to add a profile picture to their Confluence profile. That way their profile picture will be shown in the table. We’ll get to how you can pull this profile image into the table later in the post.
As a team leader, you could well be thinking, “Do l need to create this page? I know who is on my team and what role they play”. However, This page is less a benefit to yourself and more a resource for your team and project stakeholders. Such a page provides clarity to everyone involved in the project, specifically, 1. who is on the project and 2. what is their role. For those who like to/are required to create a RACI matrix, this team page isn’t intended to replace a RACI. Although, you could use the same approach illustrated in this post to create a RACI matrix in Confluence.
Ok, let’s get started
1. Create a new page
Navigate to the directory in your space where your team page will be located. Create a new page and call it “team”.
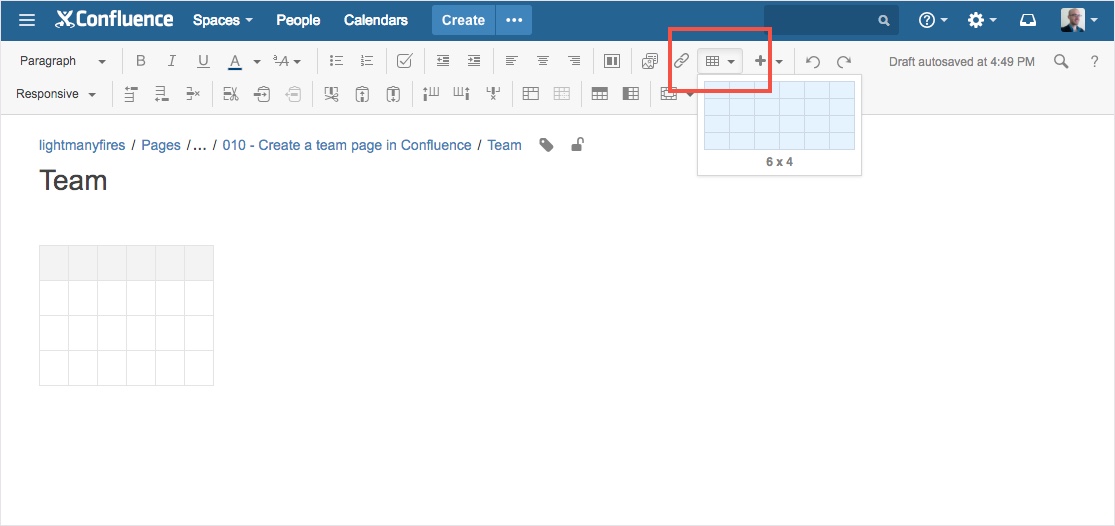
2. Add a table with team header attributes
Go into edit mode for the page, and from the rich text editor add a table with 6 columns as seen below.
Specific to this example, we will have three sections to our team page.
- Internal agency team.
- Client contacts and external project stakeholders.
- Key contacts from the 3rd party technical supplier.
Ensure that your table has at least 12 rows, you can always add more later. Break up the table horizontally into 3 sections using the table heading row icon as seen below.
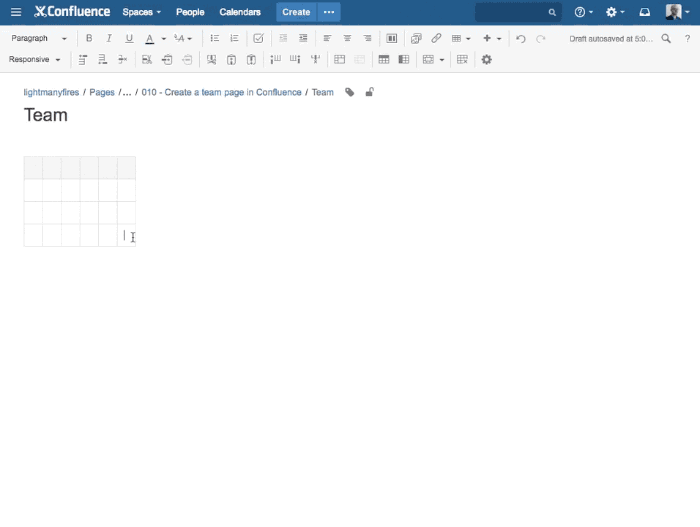
You may be thinking, “why don’t we create 3 tables?” You totally could. However, I find this layout neater.
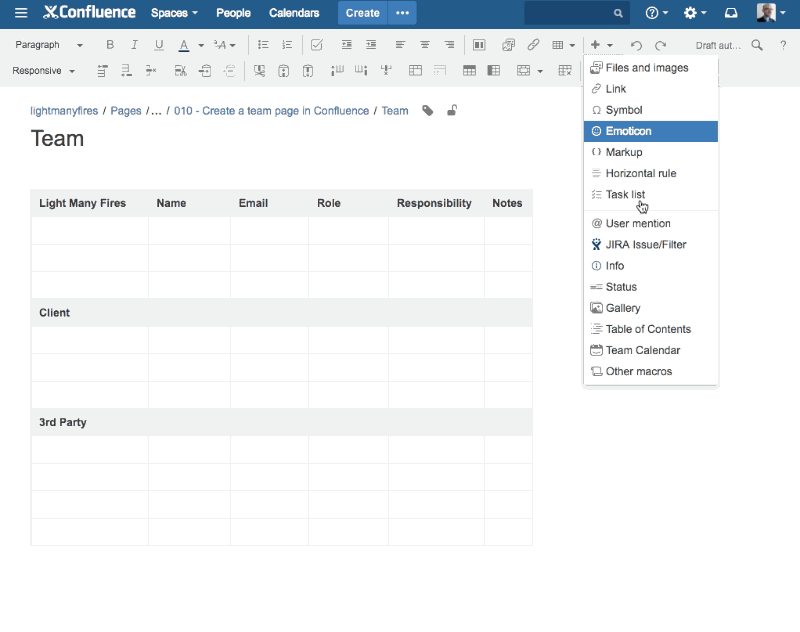
Add the following header names to the columns
- [ Team ] (add in the name of the appropriate teams)
- Name (name of the personnel)
- Role (role of the personnel)
- Email (personnel’s email address)
- Responsibility (the responsibility of the personnel while on the project)
- Notes (any notes that would be useful to let your team know, such as the date the personnel came onto the project )

Note: the layout above is just a framework for you to scaffold out a team page. Please modify the column headers to suit the needs of your project.
3. Add the profile picture macro
Ideally, you should aim to have your team add their photos to their Confluence profile. Personally, I think it adds more team feel to the space if everyone’s photo is visible. If external parties are using your Confluence instance, I would recommend asking them to add their photo also.
We will use the “Profile picture” macro to pull in the user’s profile pic into the first column of the table. To do this, simply activate the macro’s dialogue box and search for “Profile picture”. Once you have selected the macro, search for and select the user’s name as seen below.
To speed up the process of adding the “Profile picture” macro for each of the personnel. I recommend going through the above process once, followed by copying and pasting the macro into the first column for each person. Edit each of copied macros, swapping out the name for the appropriate user. I find this workflow faster than adding the “Profile pic” macro from the Macros dialogue box for each user.
4. Add the personnel’s information
Now, with a good cup of coffee or tea by your side, go through and fill out the information for each person on the project.
The example team page that was provided at the start of the post had quite a small number of personnel on the project. As you start adding your project’s resources, then both internal and external stakeholders, you’ll be surprised how quickly the page grows in length.
5. Share the page with your team
Once you’re done completing the team page, don’t forget share this page with your team and external parties. While you’re the owner of this page, I would encourage you to ask the respective individuals to update their information as their details change. Furthermore, whenever you have a new member join the team, be that internally or externally, I would recommend sending that new member the team page, and if possible, talking them through the personnel on the project.
Lastly, at any given point in time, this page should be an accurate snapshot of the people involved in the project. If you’re diligent and keep this page up to date, accurately documenting when personnel join and leave the project. This page will contain a huge amount of invaluable project information, and will expedite the process when onboarding new project members.
As always, I hope you found this post useful. If you have any friends or colleagues that would also enjoy this post, please share it with them!
If you have any questions or comments, please leave them in the comments section below. I’ll get back to you as soon as I can.
Liam