
In this post, we’re going to look at how to create your own custom Confluence blueprints. However, before we jump into the details, let’s take a step back and ask…
What is a Confluence Blueprint?
The easiest way to think about a blueprint is a template, a way of replicating a page layout over and over again. A blueprint can include layout such as headers, page divisions, tables etc. Moreover, you can also include macros, labels, pretty much everything you’d want in a template. By creating your own blueprints, you will decrease the effort required to complete your work by not having to repeat the same menial tasks time and time again. Furthermore, you will increase consistency across your space as both you and your team will be creating the same layouts.
The point here is, if you spend the time upfront thinking about the required workflow, then putting in the effort to create the blueprint, you’ll reap the rewards in the future.
To illustrate this topic, we are going to create a dependency template for a project. Namely, a template that we can use to create a project dependency page. As an extension to this example, we’ll draw upon some of the knowledge gained in a previous post How to create summary pages in Confluence to create a full dependency tracker for the project.
Goal: Create our own custom Confluence Blueprints
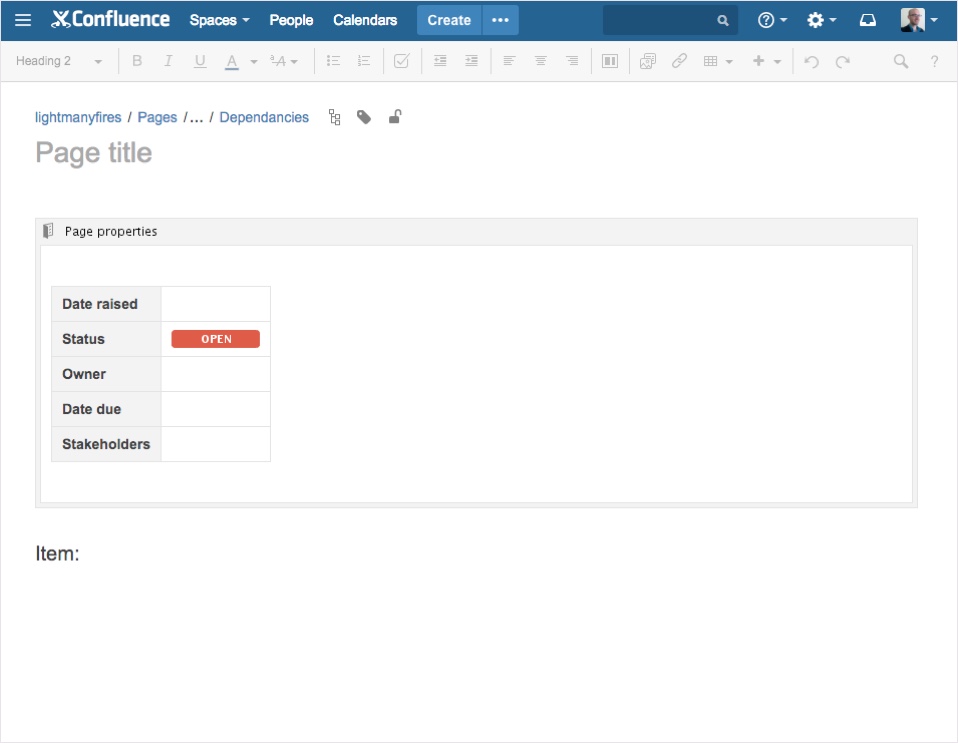
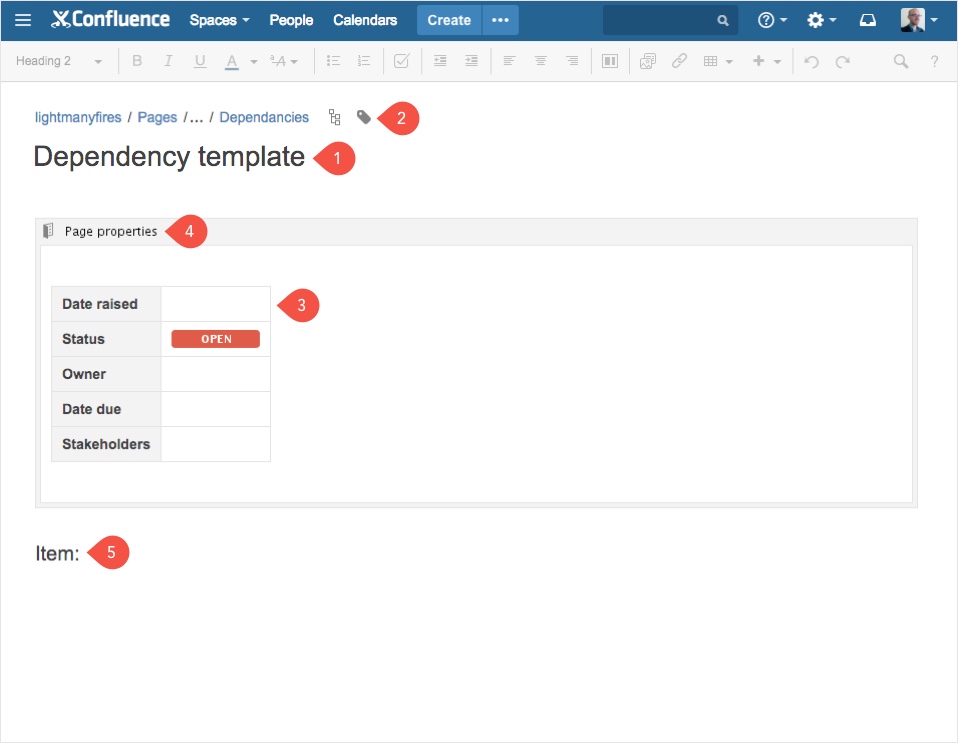
Below is the dependency blueprint that we’re going to create. It’s a simple layout containing a table that is wrapped in the page properties macro, followed by an H2 header “Item”. Once this blueprint is created, it will always be available to us via the standard blueprints dialogue window.
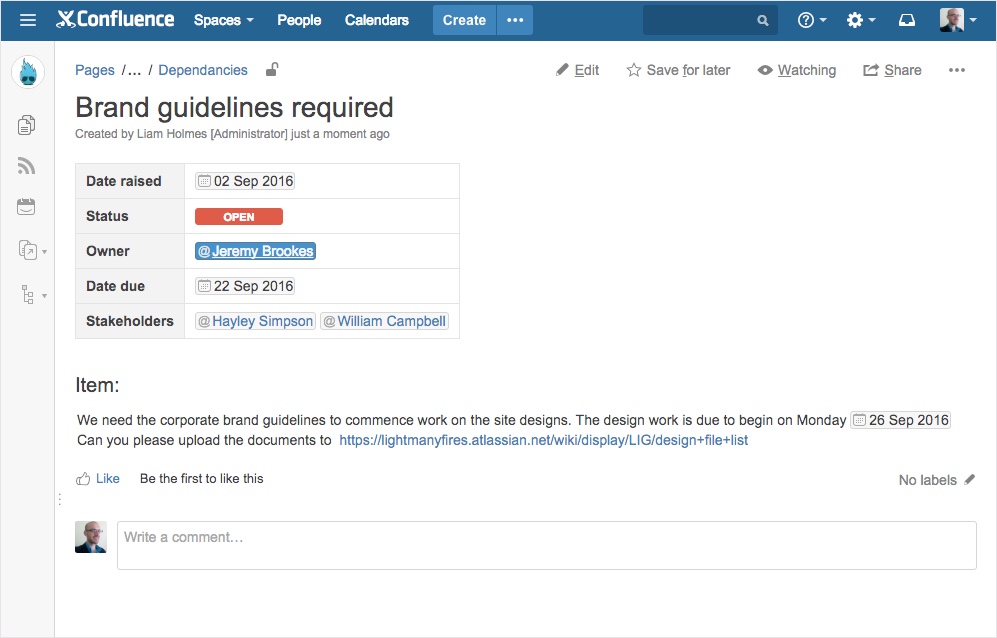
Below is an example of a page created from the blueprint.
Below is a screen shot of the dependency tracker that we’re going to create:
![]()
Now before we jump into creating our own blueprints, let’s quickly have a look at the default blueprints provided by Confluence.
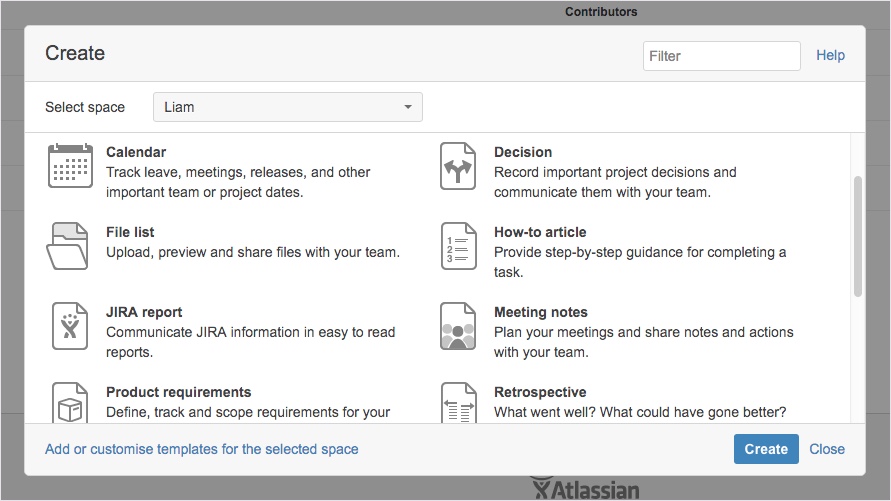
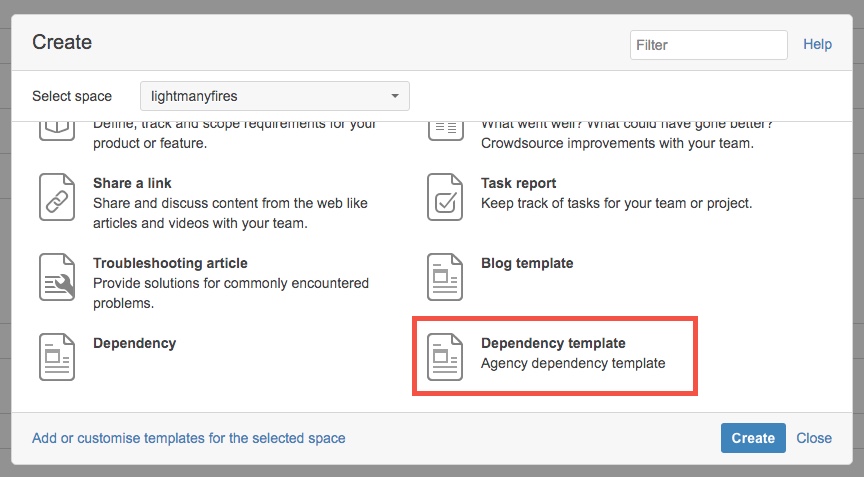
Confluence out of the box has numerous blueprints, depending on what version of Confluence you’re using. When you hit the “Create” button or the “ellipsis” button next to the “Create” button in the top nav bar, you will be presented with the window below, displaying all the default blueprints that Confluence ships with. Furthermore, any custom blueprints that either yourself or you colleagues have created for this space will be surfaced in this window.
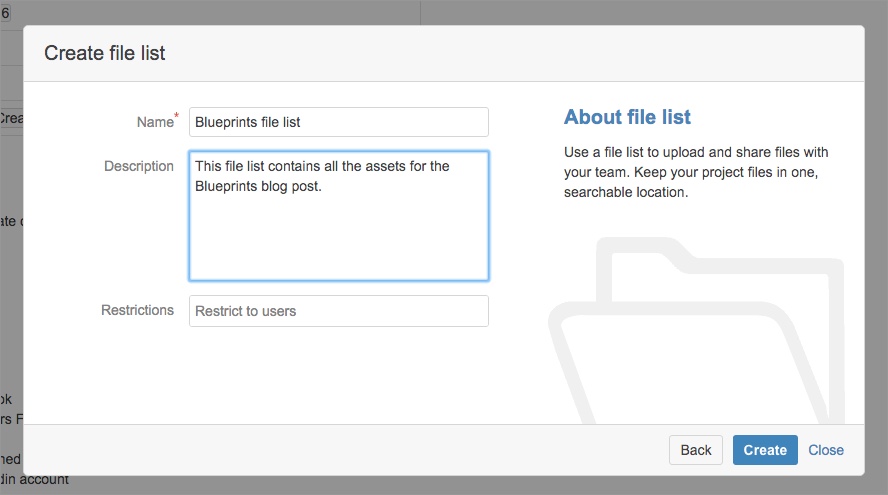
As an example, if we choose the “File list” blueprint, we are presented with a dialogue asking us to name the page and give it a description. Let’s do just that. Then hit “Create”.
Once the page is created, go into edit mode. What we’ll find is it is just a page with the following:
- A header
- Some paragraph copy
- The attachment macro
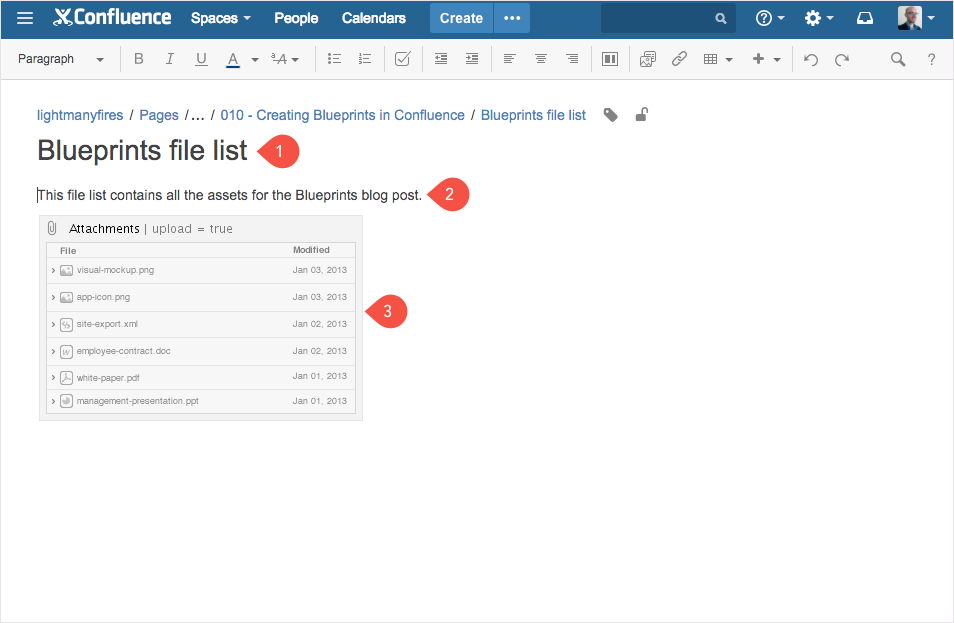
There’s no reason that we couldn’t create this layout from scratch each time. However, this page is something you’d create numerous times across a Confluence instance. Hence the logic to create a blueprint out of it.
We’re now clear on what blueprints are and how they’re used by default in Confluence. Let’s now make one of our own.
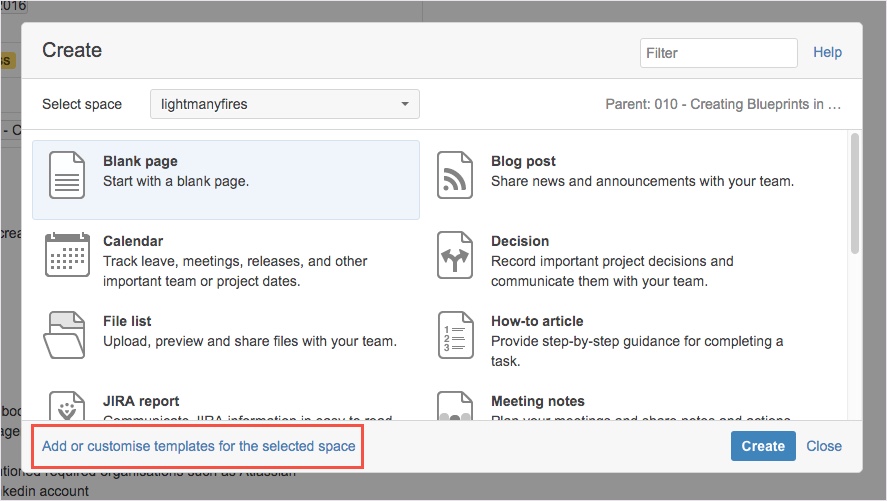
1. Bring up the Confluence blueprints window
Bring up the blueprint window, and at the bottom of this overlay you should see a link “Add or customise templates for the selected space”. If you do see that link then click the link and move onto step 2. If you don’t see the link, it is likely that you don’t have the required permissions to create blueprints. You will need to speak with whoever is in charge of your Confluence instance to grant you the required permissions.
2. Create the required template
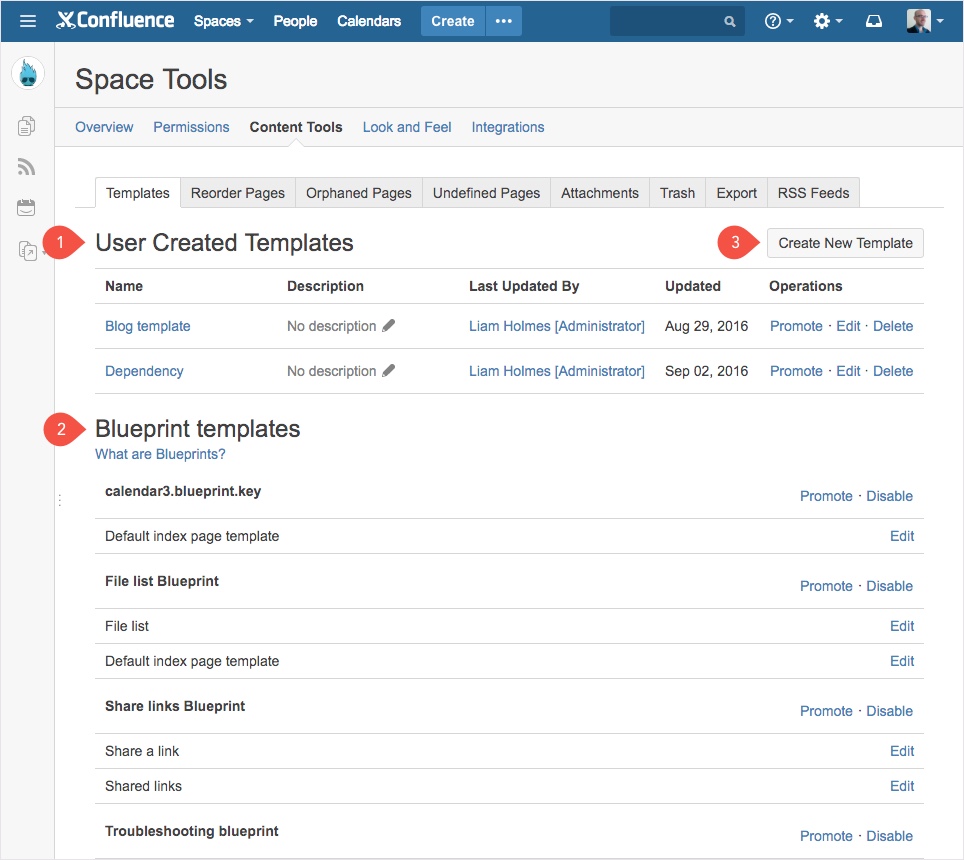
Next, you’ll be presented with the following “content tools” page to create and manage your existing blueprints.
Point 1 highlights the user created templates. In the the screenshot below, there is two user created templates set up for this space. One that is used to manage the blog posts on Light Many Fires. And secondly, the dependency template which we are creating up now. However, it was earlier in preparation for this post.
Point 2 highlights the section that houses all the Confluence default blueprints. Here you can manage and modify these templates.
Point 3 highlights the button to click in order to create your new template. Click the “Create New Template” button.
3. Craft the content and layout of your blueprint
You’ll be presented with a blank page. Get a good cup of coffee (or tea) and build out a layout to dominate all layouts! In this example, we are going to add the following:
- Give the blueprint a name.
- Give the blueprint a unique label. We can use this label as a hook to pull all the pages created from this dependency blueprint into the dependency tracker.
- Add a table with the required attributes.
- Wrap the table in the page properties report macro.
- Add an H2 header called “item”.
Once you’re done, save your page. You’ll be taken back to the “content tools” page as seen below.
- The newly created Dependency template is shown.
- Give your blueprint a description. The description will be shown next to your blueprint in the blueprint selector window. The layout of this description is shown in a screen shot below.
- Finally, you can edit or delete your blueprint. Furthermore, you can promote it so it appears first in the blueprint selector window.

It’s that easy to create a Confluence blueprint. To complete the dependency tracker, simply create all the dependencies for your project from the newly created blueprint. Then create a summary page including the page properties report macro to surface those dependencies into a single page. If you’re not sure on to do this, please see the post How to create summary pages in Confluence for a detailed tutorial.
I hope this post has sparked a few ideas for how you. Namely, how you can introduce custom blueprints into your daily workflow, saving you and your team time and increasing consistency across your Confluence space.
As always, I hope you found this post useful. If you have any friends or colleagues that would also enjoy this post, please share it with them!
If you have any questions or comments, please leave them in the comments section below. I’ll get back to you as soon as I can.
Liam