
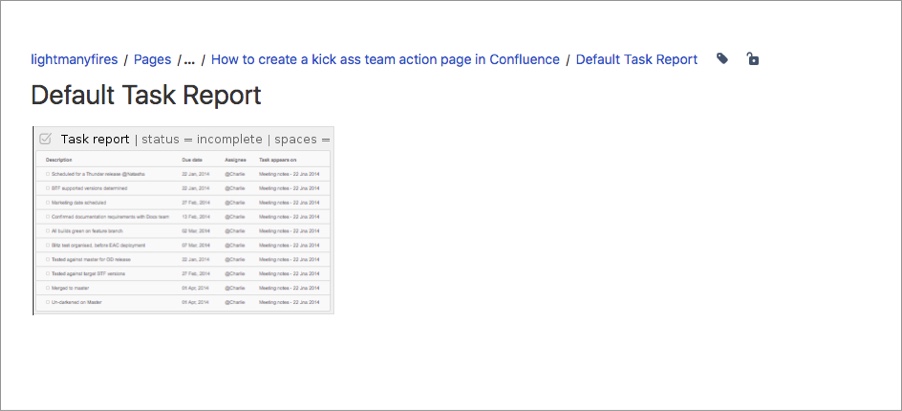
Two of the key features of Confluence that I use religiously on all my projects is “Actions” and the “Task Report macro”. I find it super useful in keeping all my team’s actions in one place. However, the challenge I have with Confluence’s default Task Report page, which groups all your actions into a single list, is it can get pretty long. Furthermore, it can be quite tedious for both yourself and your team to trawl through rows of tasks, trying to find those which apply to them. The screenshot below is a typical example of what one of these task report pages can look like–not ideal.

However, wouldn’t it be great if we could leverage the power Confluence, pulling in your team’s tasks across the respective space, or even across multiple spaces, and yet have a way to visually group and organise tasks for each team member? This post is going to demonstrate just that, and the screenshot below showcases the page that we’re going to create. Note, that the tasks seen in the screenshot below are the exact same tasks as listed in the screenshot above, yet are logically grouped for each team member. Nice, hey!

The task is very straightforward. If you look at the default Confluence task report page, it’s merely a single page housing the task report macro (as seen below).
Note: if you didn’t use the out-of-the-box Task Report template, then you can create the same configuration by creating a new page and dropping in a single “Task report” macro.
While in edit mode of your page, double-click on the Task Report macro and you should see the following modal window as seen below. This view will allow us to modify the default behaviour of the macro.
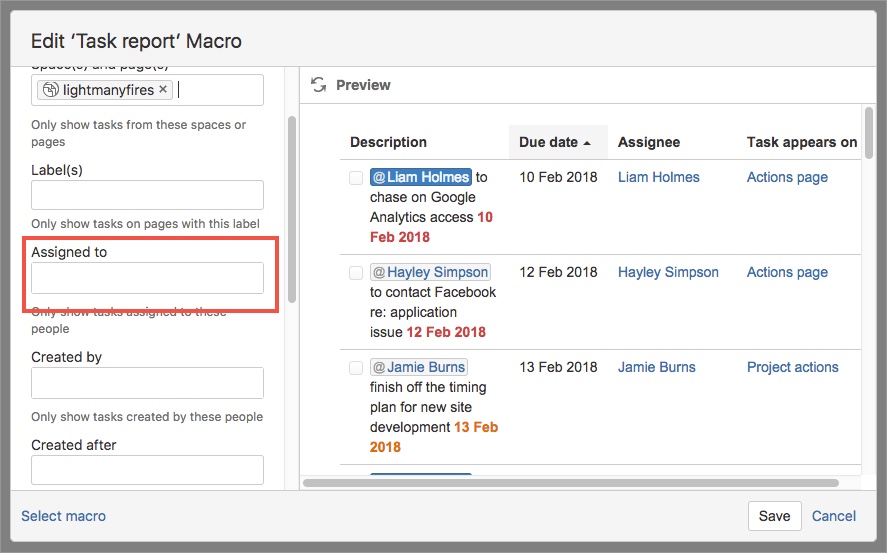
As highlighted above in red, there is an input called “Assigned to” which will allow you add in one or more users for which the macro will aggregate their tasks.
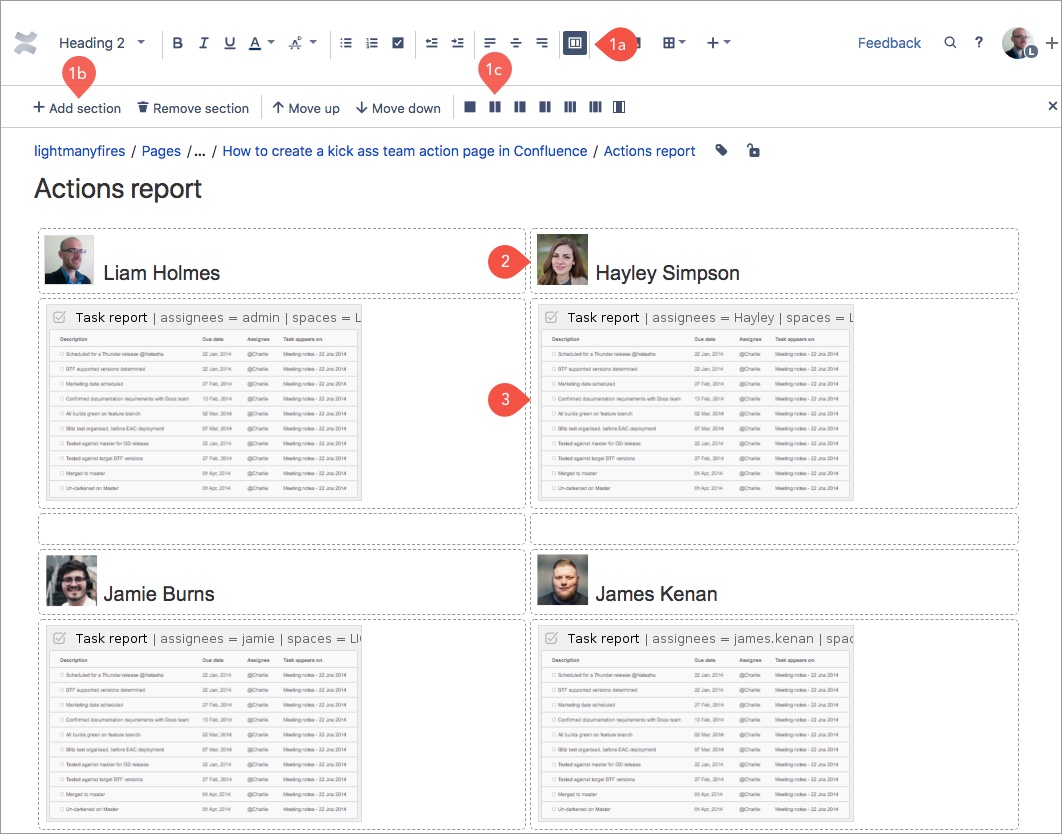
So you can probably see what we’re going to do. We’ll break up the page into the desired layout, then add multiple instances of the task report macro. Specifically, one for each user. Below is a screenshot of the desired layout in edit mode
-
Create the layout
(1a, 1b, 1c) Using the “Page Layout” button in the toolbar, break the page up into your desired layout. Here I created a 2-column layout with a section containing the user’s name and profile image and an additional section to house their Task Report macro.
-
Add the user’s name and image
Type in the user’s name. I used an H2 header for the user’s name to ensure that the names stand out on the page. Additionally, by using the “Profile Picture” macro you can display the user’s profile pic, which I think is a nice personal touch.
-
Drop in the multiple Task Report macros
Finally, add a Task Report macro for each user and add the respective person the “assigned to” field for that macro.
Now you should be all done, save your page and bask in the glory of your newly constructed task report page. If any of the content isn’t displaying as expected, go back into edit mode of your page and check the configuration for each of the macros.
Pro tip:
Now that you have a single URL containing all of your team’s tasks, what I recommend doing is, each morning send around that URL on your teams chat service of choice. This circulation is a daily reminder for each of your team members as to what tasks they are on the hook to complete. Given that you have put in the time to skillfully layout all the team’s tasks, they should have no excuses for not knowing what they had to do!