As a project manager, one of the key challenges I face on a daily basis is keeping the team and project stakeholders informed of changes to project timings. A much as we wished that our projects stuck to their original schedules, real-life kicks in, additional requests are raised, unforeseen delays happen and we need to update the project plan accordingly.
Like most project managers, I use a Gantt chart as the source of truth for the project’s schedule. However, the downside to most project plan tools is the application is local to the project manager’s machine. For example, you may update a key date on the back of a phone call with the client or 3rd party supplier. However, how do the team and project stakeholders have visibility over the latest project timings?
To circumvent this issue, you may export the most recent project schedule and stick it on the wall, or shoot it around on your team communication tool of choice such as Slack or God forbid, email.
To help alleviate the up-to-date visibility issue, I would create a dedicated page on Confluence, then paste the export directly into the page. Providing the project plan on Confluence gives the team and project stakeholders clarity over the project’s schedule whenever and wherever they choose.
However, the downside to this approach is, if I update the plan on my Mac and forget to update Confluence, then team are working to incorrect timings. So I thought to myself “Would it be possible to automatically update the plan in Confluence every time I hit “save” in OmniPlan? And yes, I found a way! This post details step by step how to configure your project plan updates Nirvana.
Goal: Automate the project plan export process from OmniPlan into Confluence
In this post, I will be using the following tools.
- OmniPlan 3
- Confluence
- Dropbox
You don’t necessarily have to use Dropbox; you just need to have a workflow that will sync the project plan export file on your machine to a cloud-based server which can be configured to be publicly accessible and automatically downloaded via a URL.
Before we jump in, I would like to outline the high-level workflow that we’ll achieve in this post.
- Configure OmniPlan to export a version of the Project Plan in an image format every time we save the OmniPlan document.
- Save the exported file to Dropbox which will then sync with a cloud server and be accessible via a URL.
- Use one of Confluence’s macros to pull in the image via its URL and display that image on a page.
Because OmniPlan is exporting out a fresh copy of the plan every time we hit “save” and Confluence is pulling in the plan on the unique URL – we’ll always have the most up to date version of the plan in Confluence.
1. Configuring OmniPlan
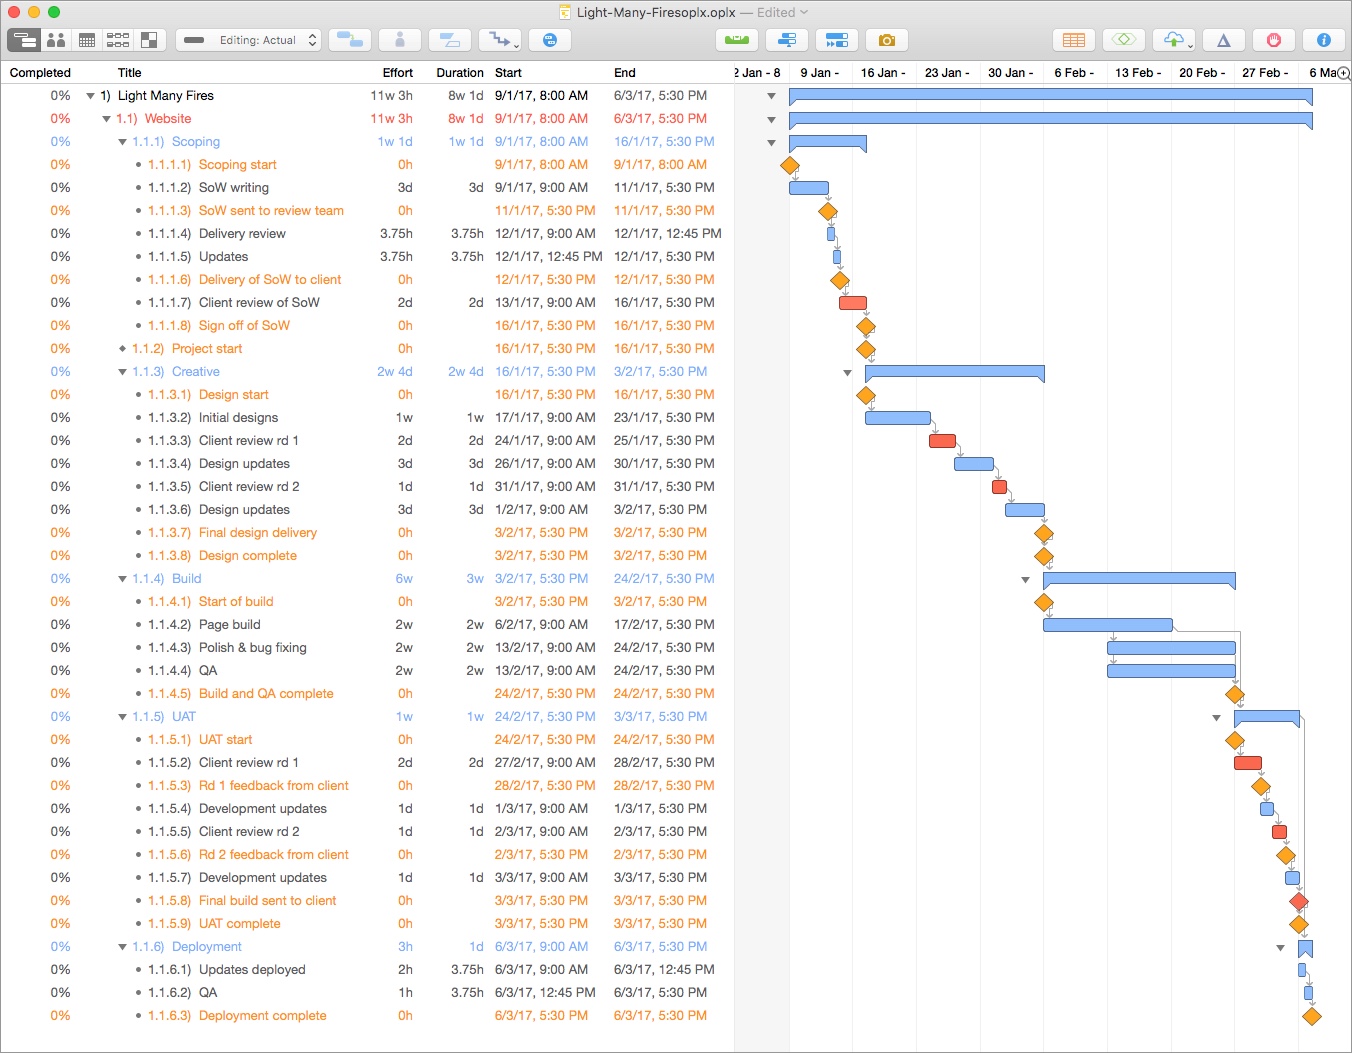
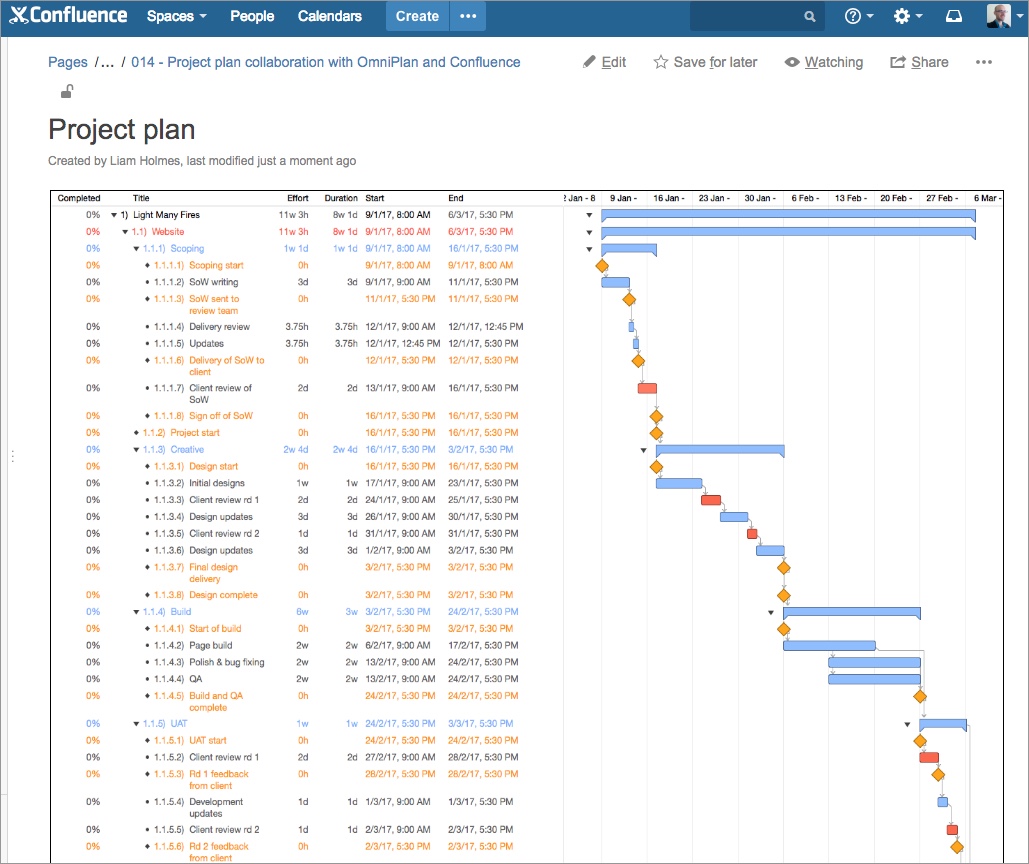
Below I have included a fictitious project plan that we’ll be using for this post.
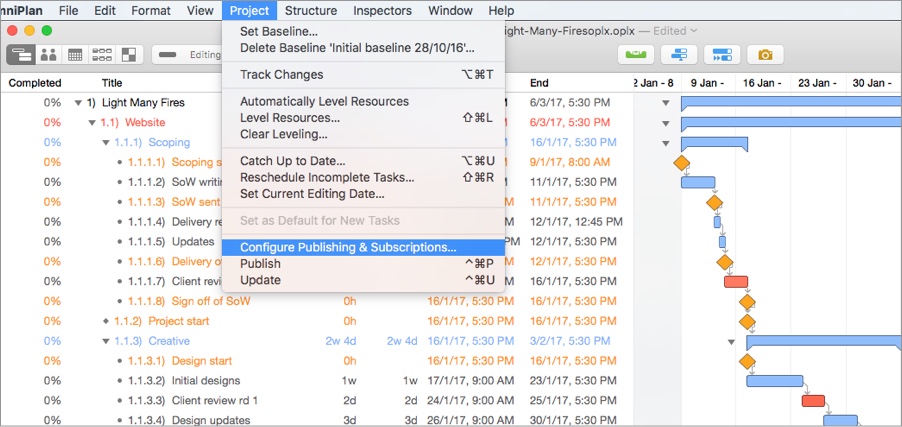
From the top menu, go to “Project” then down to “Configure Publishing & Subscriptions”.
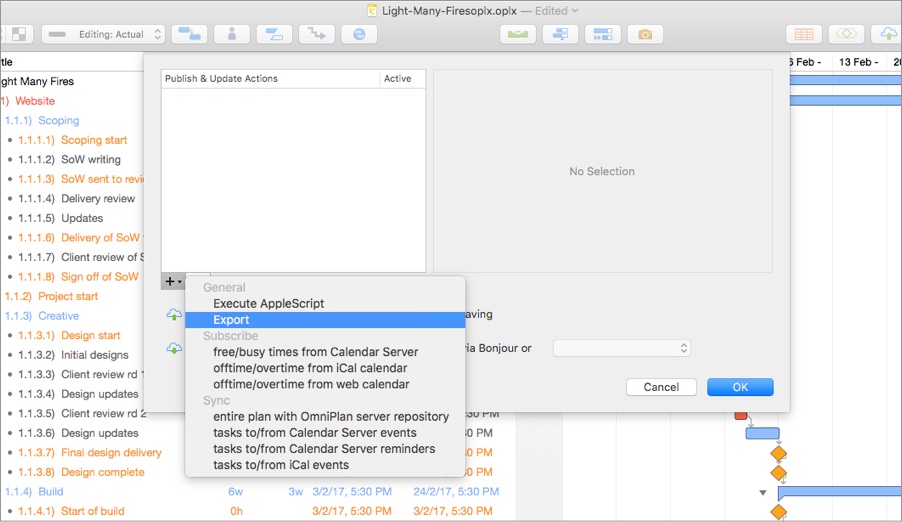
Next, we’ll are going to add an export option.
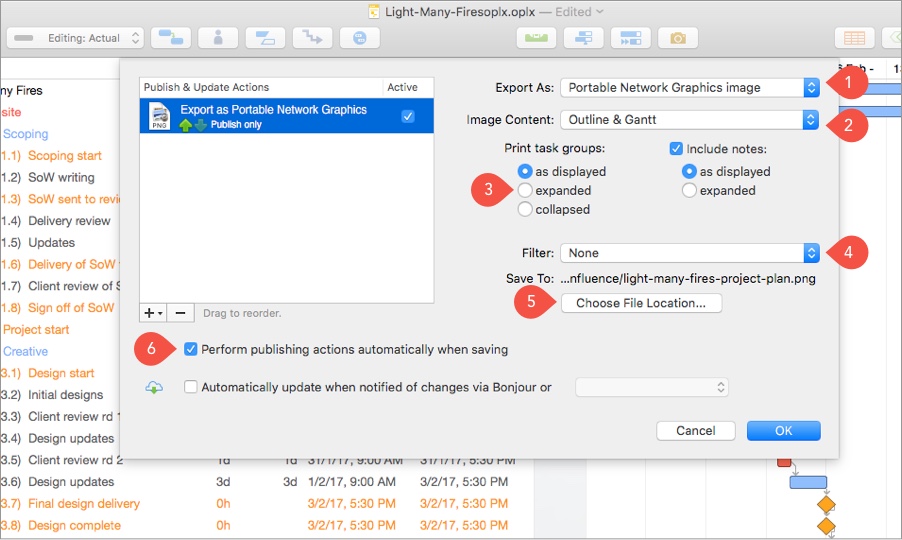
From the resulting export options (see image below)
- Here I chose “Portable Network Graphics image” which is the .png file format. However, you could have chosen JPEG if you preferred that option.
- Here I opted to include both the project outline and the Gantt. However, you can choose to display either the Gantt or the Outline if that is the layout you’re after.
- You have several options available to you as to how you would like the export to be displayed. I like to show the timeline in Confluence as I would view it in OmniPlan, hence why I have engaged the “as displayed” options.
- If you have a filter set up in your project, you can export the filtered layout. For example, you may set up a filter to only show milestones; then you could use this filter to export and communicate all project milestones in Confluence rather than the full project plan.
- Choose the location for the file export and name your exported file accordingly. In my case, I have a dedicated folder on Dropbox called “Published plans” in which all OmniPlan exports are saved to.
- Check the box to “Perform publishing actions automatically when saving”. This option will ensure that every time that you save your OmniPlan document the latest version of the plan will be made available in Confluence.
2. Configure Dropbox
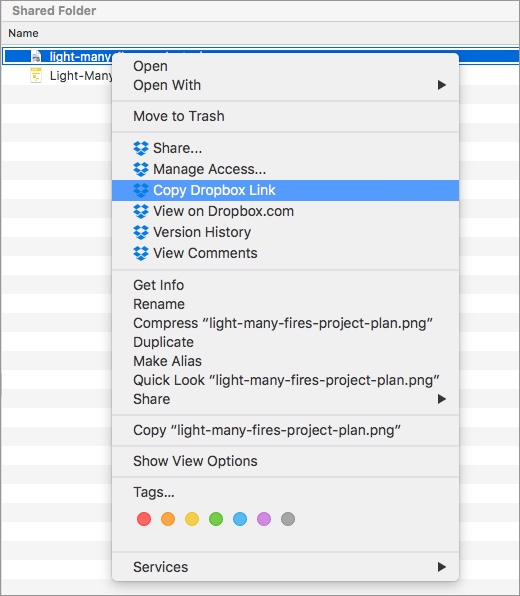
To pull the exported plan into Confluence, we need to ensure that the file is publicly accessible via a URL. In my case, I have right-clicked on the exported file in finder and copied the link to my clipboard. However, you could have as easily accessed the public link via Dropbox’s web interface. Once you have your file’s public URL, paste it somewhere until we use it for the next section.
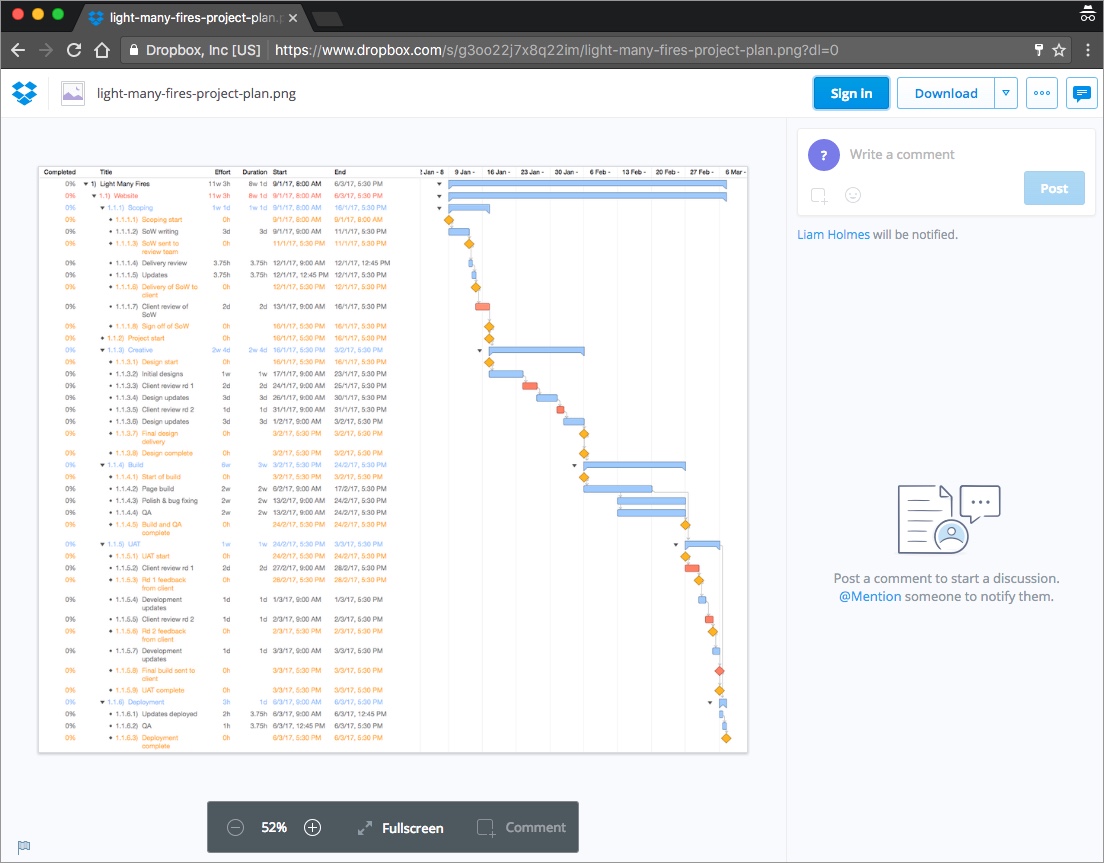
Tip: To test that plan can be accessed via the URL, I like to open a new private browser window and paste the link into the search bar. If the image displays fine, then we know that Confluence will be able to access it. If you can’t see the plan, please check your export settings in OmniPlan, double-check you have the correct URL for your file and re-test.
3. Configure Confluence
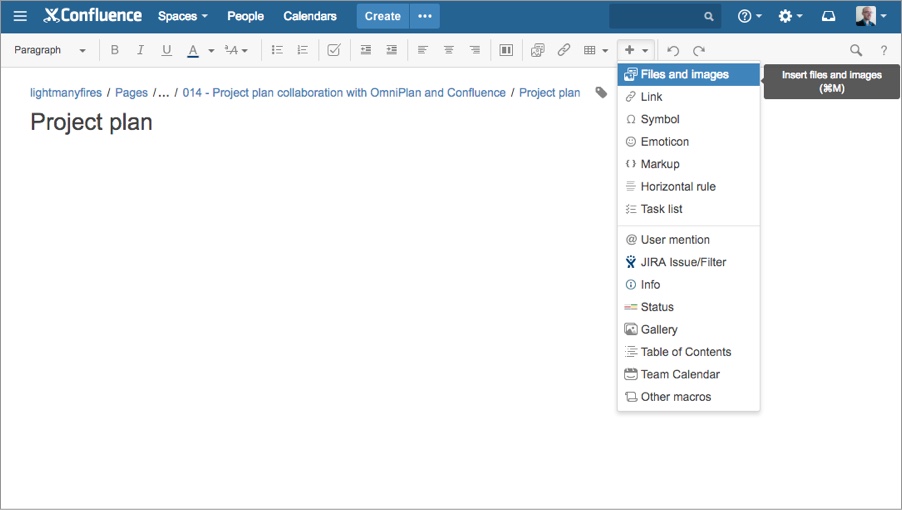
In this instance, we’ll create a dedicated page to hold our project plan. However, you could easily include the project plan in an existing page. Below I have created a page, and we’ll add the “Files and Images” macro from the toolbar drop down.
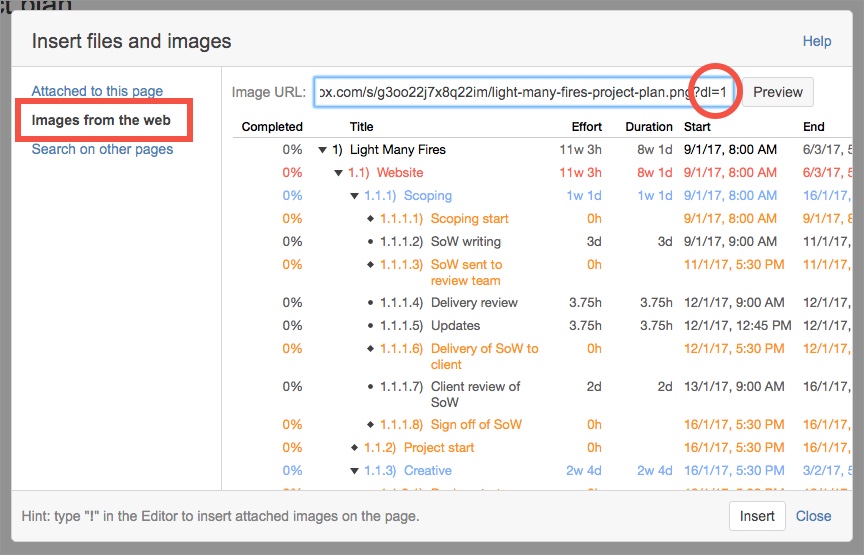
From the resulting modal window
1. Select “images from the web” link on the left-hand side.
2. Paste in your Dropbox URL into the image URL field.
3. SUPER SUPER IMPORTANT! At the end of the URL change the query string parameter from “dl=0” to “dl=1”. This will force the file to be downloaded and is essential to making this process work correctly.
4. Click “Preview” and ensure that the preview image is displayed. If this isn’t working, make sure you’ve correctly completed point 3 above.
5. Once the plan is displayed click “Insert.”
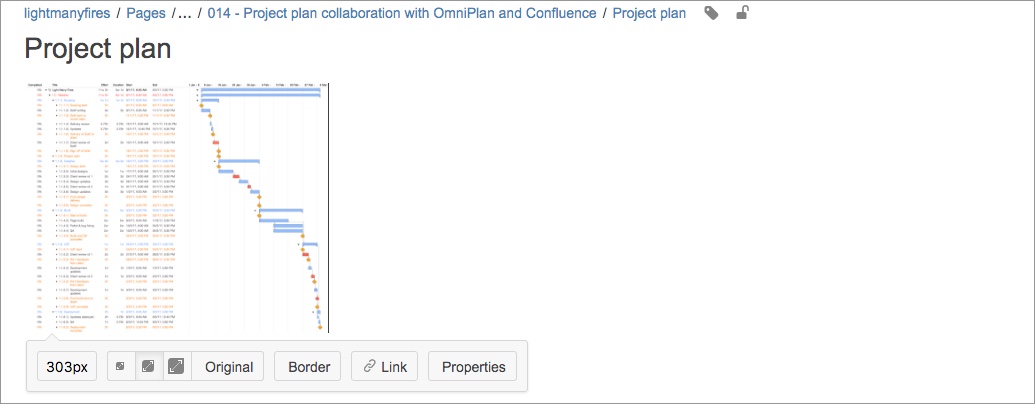
You will then see a similar image to the one below.
At this resolution, no one will able to read it. I usually increase the width of the image to around 900 – 1000px and add the border option.
Now for the final test! Go back to OmniPlan increase one of the tasks that would clearly indicate a visual change in the plan. Hit save in OmniPlan, give Dropbox a few seconds to sync, head back over to Confluence, refresh the page and Boom, you’re done! Don’t forget to head back to OmniPlan, undo your change and hit save!
As always, I hope you found this post useful. If you have any friends or colleagues that would also enjoy this article, please share it with them!
If you have any questions or comments, please leave them in the comments section below and I’ll get back to you as soon as I can.
Liam


